Thermocouples are essential temperature-sensing devices used in countless homes and industrial settings. Thermocouples are essential temperature-sensing devices used in countless homes and industrial settings. From your gas furnace to ovens and water heaters, they play a vital role in regulating and monitoring heat. But like any component, thermocouples can fail over time. Understanding why Thermocouples Stop Working? is key for troubleshooting and ensuring your appliances function safely.
Key Takeaways
- Thermocouples can fail due to mechanical damage, corrosion, contamination, age, improper installation, and sometimes manufacturing issues.
- Common signs of failure include the pilot light not staying lit, inaccurate temperature readings, and unexpected device shutdowns.
- Before replacing, try troubleshooting with a visual inspection, multimeter test, and cleaning.
- Simple maintenance tips can extend a thermocouple’s lifespan.
What is a Thermocouple?
A thermocouple is a simple device consisting of two dissimilar metal wires joined at one end the sensing junction. Based on the Seebeck effect, it generates a tiny voltage (measured in millivolts) proportional to the temperature difference between the sensing junction and the other end of the wires (the reference junction). This voltage is what your appliance uses to regulate temperature.
Here’s a quick breakdown of how a thermocouple works in a gas appliance:
- Pilot Light: The pilot light heats the sensing junction of the thermocouple.
- Voltage Generation: The heat difference creates a voltage.
- Gas Valve: When the voltage is sufficient, it signals the gas valve to stay open.
- Safety Feature: If the pilot light goes out, the thermocouple cools, the voltage drops, and the gas valve closes, preventing dangerous gas leaks.
Common Reasons Thermocouples Stop Working
Let’s find the most frequent causes of thermocouple failures:
Mechanical Damage
Thermocouples can be fragile. Bending, kinking, or accidental impact can damage the wires, affecting voltage generation. Even minor damage can lead to inaccurate readings or complete failure.
Corrosion and Oxidation
Exposure to moisture, combustion byproducts, and other contaminants can cause corrosion or oxidation of the metal wires. This buildup interferes with the thermocouple’s ability to generate a reliable voltage signal.
Contamination
Dust, dirt, and other debris can coat the thermocouple’s sensing junction, insulating it and preventing accurate temperature measurement. This contamination can also accelerate corrosion.
Age and Wear & Tear
Even with proper care, thermocouples have a finite lifespan. Constant exposure to heat cycles and environmental factors causes gradual degradation of the metal wires, eventually leading to failure.
Incorrect Installation
Several installation errors can lead to thermocouple problems:
- Improper Positioning: The sensing junction needs to be correctly positioned within the pilot flame for optimal heat exposure.
- Loose Connections: Loose connections at the control valve can create electrical resistance, affecting the voltage reading.
- Wire Damage During Installation: Overtightening or rough handling can damage the wires.
Manufacturing Defects
While less common, thermocouples can sometimes have manufacturing flaws affecting their performance and longevity.
Table: Common Corrosive Agents and Their Effects
| Corrosive Agent | Effects |
|---|---|
| Moisture | Rust formation, particularly on iron-based thermocouples |
| Sulfur Compounds | Formation of sulfides, which can reduce conductivity |
| Carbon Monoxide | Can lead to carbon deposits, insulating the thermocouple |
Signs That Your Thermocouple Stop Working
Here are some telltale signs that indicate a faulty thermocouple:
- Pilot Light Issues: If the pilot light won’t stay lit or struggles to ignite, it’s a strong sign the thermocouple isn’t generating the necessary voltage.
- Inaccurate Temperature Readings: If your appliance malfunctions with temperature inconsistencies, the thermocouple might be sending incorrect signals.
- Unexpected Shutdowns: A failing thermocouple may cause your gas appliance to shut down randomly as a safety precaution.
- Physical Damage: Any visible cracks, kinks, or corrosion on the thermocouple necessitates replacement.
Troubleshooting a Faulty Thermocouple
Before replacing a thermocouple, some basic troubleshooting can save you time and money. Remember, always prioritize safety and consult your appliance manual.

1. Visual Inspection
- Examine for Damage: Check for cracks, bends, or signs of corrosion along the thermocouple wire and sensing junction.
- Check Pilot Flame Position: Ensure the pilot flame engulfs the tip of the thermocouple for maximum heat exposure. You may need to gently adjust its position.
- Look for Contamination: Clean away any buildup of soot, dust, or debris from the sensing junction using a soft brush or compressed air.
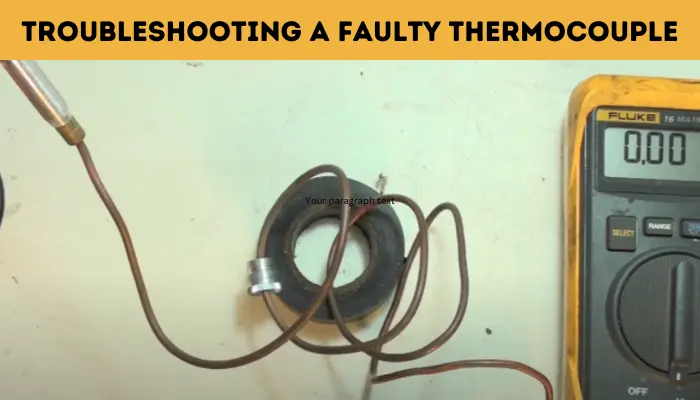
2. Testing with a Multimeter
A multimeter can verify if your thermocouple is generating the correct voltage. Here’s a simplified guide:
- Safety First: Turn off the gas supply and power to your appliance.
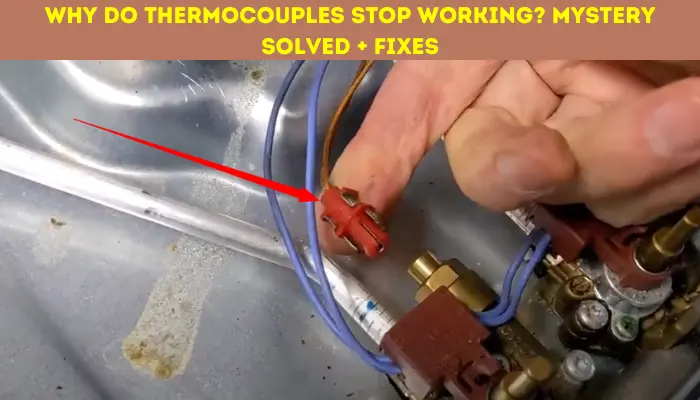
- Disconnect Thermocouple: Carefully disconnect the thermocouple wires from the gas valve.
- Set Multimeter: Set your multimeter to measure DC millivolts (mV).
- Heat the Sensing Junction: Using a lighter or match, carefully heat the thermocouple’s tip. Be cautious not to overheat or melt the wires.
- Observe Readings: A healthy thermocouple should generate a reading of around 25-35 mV. Significantly lower readings indicate a problem.
3. Cleaning the Thermocouple
If the visual inspection reveals contamination, attempt cleaning:
- Use Fine-Grit Sandpaper: Gently sand the tip of the thermocouple to remove oxidation or buildup.
- Isopropyl Alcohol: Wipe the thermocouple down with isopropyl alcohol for degreasing.
- Reinstall and Retest: Reinstall the thermocouple, ensuring proper connections and test its function.
Important Note: If these troubleshooting steps don’t resolve the issue, it’s likely time to replace the thermocouple.
Replacing a Thermocouple
Replacing a thermocouple is generally a straightforward DIY task for those with basic mechanical skills. Here’s a general overview:
- Identify the Correct Replacement: Find the exact model or a compatible universal thermocouple for your appliance.
- Turn Off Gas Supply: This is critical for safety.
- Remove Old Thermocouple: Trace the old thermocouple, carefully disconnecting it from the gas valve.
- Install New Thermocouple: Follow the reverse process, ensuring correct placement and tight connections.
- Test the Appliance: Turn on the gas, relight the pilot, and test if your appliance functions as expected.
Prolonging Thermocouple Lifespan
Simple maintenance can help extend the life of your thermocouple:
- Regular Inspections: Visually check your thermocouple during routine appliance maintenance.
- Gentle Cleaning: Remove buildup if needed, following the cleaning steps outlined earlier.
- Protect from Harsh Environments: If possible, shield your thermocouple from excessive moisture or corrosive elements.
Frequently Asked Questions (FAQs)
Can a faulty thermocouple be dangerous?
Yes. A malfunctioning thermocouple can lead to gas leaks, posing a fire or explosion hazard.
Can I repair a damaged thermocouple?
It’s not recommended. Replacement is usually the safest and most reliable option.
How long do thermocouples typically last?
A thermocouple’s lifespan varies with usage and environmental factors but generally ranges from 3-10 years.
What causes a thermocouple to stop working?
Thermocouples can fail due to several reasons, including mechanical damage, corrosion, contamination, wear and tear, improper installation, and sometimes manufacturing defects.
How can a thermocouple fail?
Thermocouples can fail in different ways. They might stop generating enough voltage, become intermittent, or fail completely.
How long should a thermocouple last?
A thermocouple’s lifespan can range from 3-10 years, depending on usage, environmental factors, and quality.
What is the common problem with a thermocouple?
One of the most common thermocouple problems is a failure to generate sufficient voltage, often caused by corrosion, contamination, or damage to the sensing junction.
